Inkscape 设置指南
¥Inkscape Setup Guide
本指南展示了设置 Inkscape 以创建符合 Featherity 设计指南的图标的步骤。
¥This guide shows the steps to setup Inkscape for creating icons that conform to the Featherity design guidelines.
设置画布
¥Setting up The Canvas
打开新文档时,Inkscape 将创建一个默认大小的画布。要将尺寸更改为 24x24:
¥When opening a new document, Inkscape will create a canvas of a default size. To change the size to 24x24:
打开“文档属性”对话框(文件 -> 文档属性)。
¥Open the Document Properties dialog (File -> Document Properties).
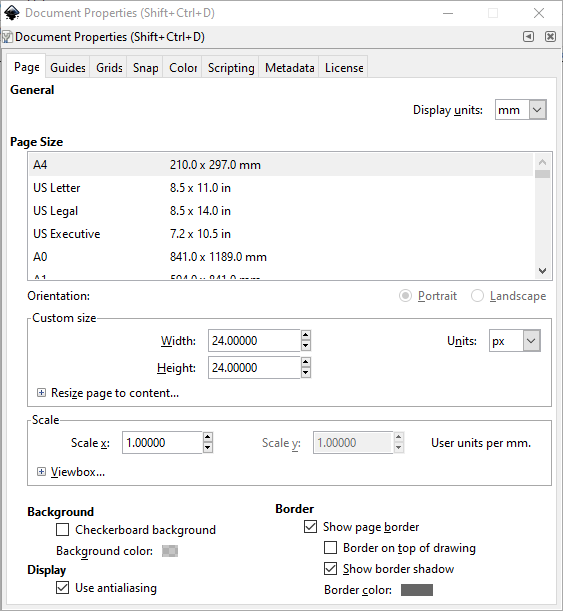
在“页面大小”选项卡的“自定义大小”下,将“单位”设置为
px,并将“高度”和“宽度”均设置为 24。¥On the “Page Size” tab, under “Custom Size” set the Units to
pxand set both Height and Width to 24.
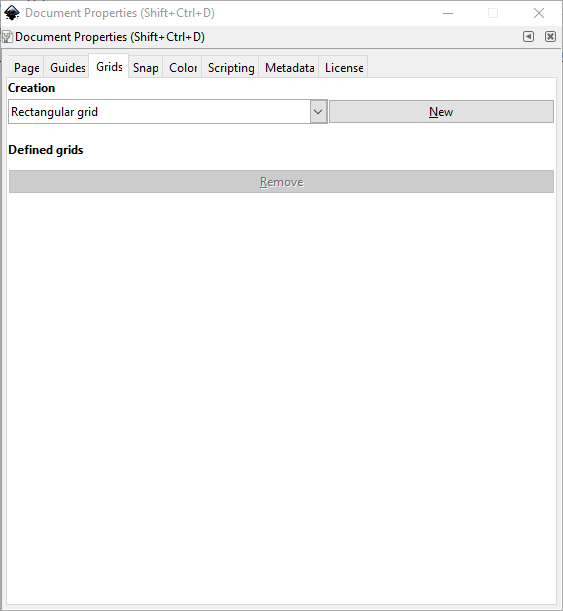
在“网格”选项卡上,选择
Rectangular Grid并点击“新建网格”。¥On the “Grid” tab, select
Rectangular Gridand click “New Grid”.
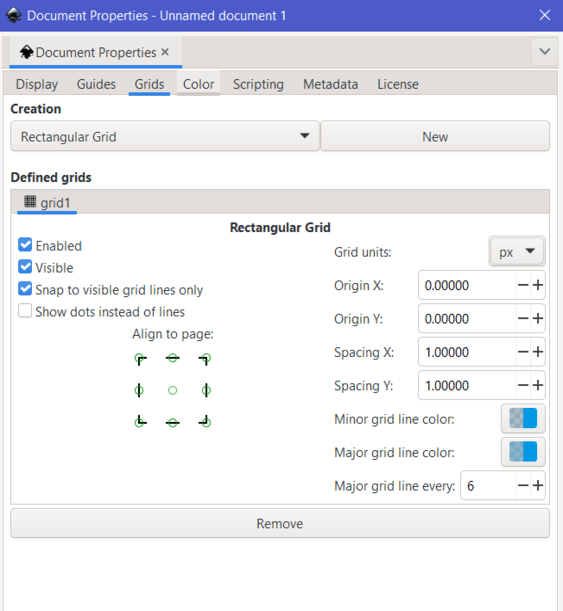
将网格单位设置为
px,并将 X 轴间距和 Y 轴间距均设置为 1。¥Set the Grid Units to
pxand set Spacing X and Spacing Y both to 1.
关闭“文档属性”对话框。
¥Close the Document Properties dialog.
要将画布置于视口中央,请选择“视图”->“缩放”->“绘图”。
¥To center the canvas in the viewport, select View -> Zoom -> Drawing.
设置路径
¥Setting up The Paths
创建路径或形状。
¥Create a path or shape.
选择路径后,按键盘上的
Ctrl+Shift+F打开“描边和填充”面板。¥With the path selected, open the Stroke and Fill panel by pressing
Ctrl+Shift+Fon your keyboard.
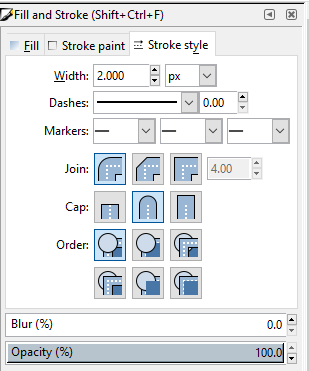
在“描边样式”选项卡上:
¥On the “Stroke Style” tab:
将描边宽度设置为
2px。¥Set Stroke Width to
2px.选择圆角连接类型。
¥Select the rounded join type.
选择圆角端点类型。
¥Select the rounded cap type.
如果形状是矩形,请选择该矩形,然后在屏幕顶部菜单栏下方将
Rx和Ry设置为2px。¥If the shape is a rectangle, select the rectangle and in the top of the screen below the menu bar, set
RxandRyto2px.
保存文件
¥Saving A File
准备保存文件时,点击“另存为”,并选择“优化 SVG”作为文件类型。
¥When ready to save the file, click Save As and select “Optimized SVG” as the file type.
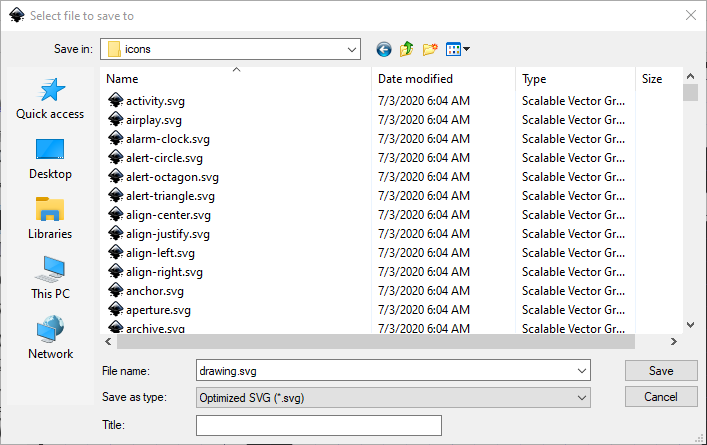
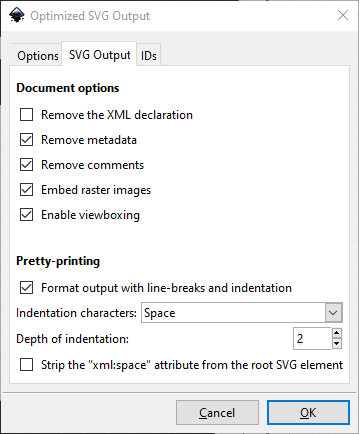
点击“保存”后,为了与包中的其他图标保持一致,请将“Pretty Printing”设置为使用空格,并将缩进深度设置为 2。
¥After clicking Save, to conform with the other icons in the package, set Pretty Printing to use spaces and set the indentation depth to 2.
